User guide › Navigating the app
The sidebar
Everything you can open lives in the left sidebar. At the top is the workspace switcher; below it, your entities and apps; at the bottom, Settings.
Related items are collected into expandable groups — Sales & Inventory, Staffing, Marketing — so a workspace with thirty entities still reads as six or seven things. Click a group to expand it; your last state is remembered.
The sidebar only shows what you’re allowed to open. If a colleague can see a section you can’t, that’s permissions, not a bug.
The order, grouping, icons and labels are all editable under Settings → Database → Navigation.
Global search
Press Ctrl + K (⌘ + K on a Mac) anywhere in the app to open the search palette. It searches across your records — not just the entity you happen to be looking at — and jumps straight to whatever you pick.
Move with the arrow keys, open with Enter, dismiss with Esc. For most people this becomes the main way of getting anywhere.
The top bar
| Control | What it does |
|---|---|
| Page title | Where you are. On a dashboard it doubles as the Edit toggle. |
| Chat | Internal team chat, and the shared inbox if a messaging app is installed. |
| Notifications | Mentions, assignments, approvals waiting on you and system alerts. A dot means unread. |
| Theme | Switches between light and dark. Remembered per person. |
| Language | Switches the interface language. Workspaces can also translate their own field labels. |
| Your avatar | Profile, preferences, security and sign out. |
Bottom-right you’ll find one or two floating buttons: the AI assistant, and — where a telephony app is installed — a call button.
Switching workspaces
The switcher at the very top of the sidebar lists every workspace you belong to, with a tick next to the active one. Picking another swaps the entire app — sidebar, records, settings and permissions all belong to that workspace.
The same menu is where you create a new workspace, rename the current one, or jump to member management.
Settings
Settings at the foot of the sidebar opens a hub with its own rail, grouped by what you’re trying to do.
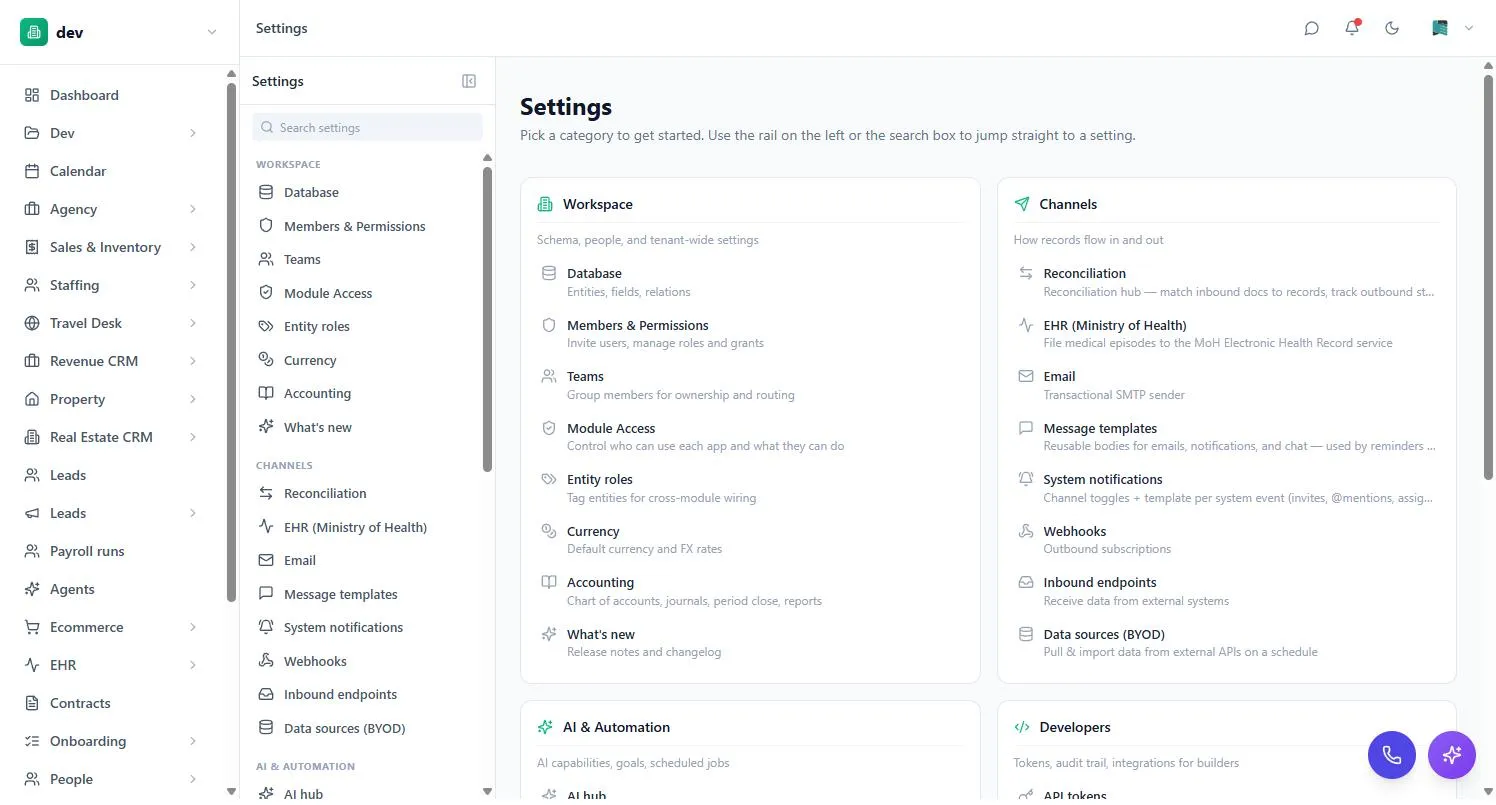
| Category | Holds | Who |
|---|---|---|
| Workspace | Database, members, teams, module access, entity roles, currency, accounting | Admin |
| Channels | Email, message templates, notifications, webhooks, inbound endpoints, data sources | Admin |
| AI & Automation | AI hub, AI access, goals, scheduled reports | Mixed |
| Developers | API tokens and the audit trail | Admin |
| Billing | Plan & billing, apps, templates, guides | Owner / admin |
| Personal | Your profile, preferences, security and connected accounts | Everyone |
If you’re not an admin you’ll still see Personal — that’s where your own profile, password, two-factor setup and language preference live. See Security & your account.
On your phone
The web app is responsive, so it works in a mobile browser. There are also dedicated apps for specific jobs — team communication, HR self-service and the assistant — which sign in with the same account. Ask your admin which ones your workspace uses.
Working offline
If the connection drops, BackOffice says so rather than silently failing, and offers to continue with the data already loaded. Changes you make are queued and sync when the server is reachable again. Treat it as a way to finish what you’re doing, not as a full offline mode.